How to build & attach an NS bolster - made simple by GC

A growing number of collectors customize their automatic knives by changing scales, bolsters, blades, doing fileworks, ... Wether you're a guru or just a wannabe knife modder, this is the place to discuss it!

Moderators: Bill DeShivs, The Motley Crew

Forum rules
There are a few things you should know before posting in these forums. If you are a new user, please click here and read carefully. Thanks a lot!
Post Reply
User avatar
ILikeStilettos
Posts: 1576
Joined: Tue Jan 28, 2014 3:36 pm
Location: Norman, Oklahoma, USA
Contact:

How to build & attach an NS bolster - made simple by GC

Post by ILikeStilettos »

OK, guys, listen up! I'm a guy who loves solid NS bolsters, which some manglers will do and others seem to shy away from, or have issues with. So I asked George Cameron what was involved, and since he was just in the process of doing some he sent words and pictures.

The funny thing about me is that from watching my dad braze and weld (MIG and Heliarc) and from seeing copper brazed in over 30 years in the HVAC industry, I know a fair amount about this. I can't actually do it, mind you, but I know about it.

When you are soldering (or brazing) dissimilar metals together choice of flux and solder is very important. Flux is usually a paste that you apply to the area and serves three functions: 1) It removes oxidation from the surfaces to be soldered. 2) It seals out air thus preventing further oxidation. and 3) It facilitates amalgamation (improves wetting characteristics of the liquid solder). I've heard flux called a 'cleaner' - to just clean the parts that you want to stick together. In some cases, if both parts are clean and shiny, no flux seems to be needed. George doesn't mention it, but I thought that I should. That last one about wetting action is very important. When you solder, the liquid solder follows the heat and will even flow uphill to a clean and properly cleaned surface. It will be drawn into every tiny crevice by something called "capillary action." When a plumber 'sweats' pipes together, he is using heat to draw the solder into the joint to seal it.

The other thing that I know is that the more dissimilar the materials you are trying to join, the higher silver content you need in your solder. Things that are easily joined require little or no silver, things that are harder to join require a higher percentage. NS, or "white brass" contains little or no silver, so what you are actually doing is joining brass bolsters to brass or steel liners. With George's shiny stainless steel liners and new blocks of NS, he seems to be home free. The solder wants to flow where he wants it. If you're working with old parts, shine them up first, and try flux or higher sliver content solder. You want the parts being joined to be above the melting point of the solder, that allows the liquid to flow and to stick.

Recently a guy told me that he couldn't find NS in 1-3/8" width, which was what was needed to do a top bolster with ears. George said that all of his top bolsters are made in two pieces. "I order my NS from Jantz Supply (http://www.knifemaking.com) parts numbers NS714 and NS715. They are 1/4" thick by 1" w x 12" long and 1/4" thick x 3/4" wide x 12" long. I use the NS 714 3/4" bar for the fronts and the NS 715 1" bar for the pommels."

George used to use solid cast NS bolsters, but this process is no longer available; it's very toxic to the caster. He does occasionally use solid sterling silver bolsters, but those have a considerable upcharge over NS.

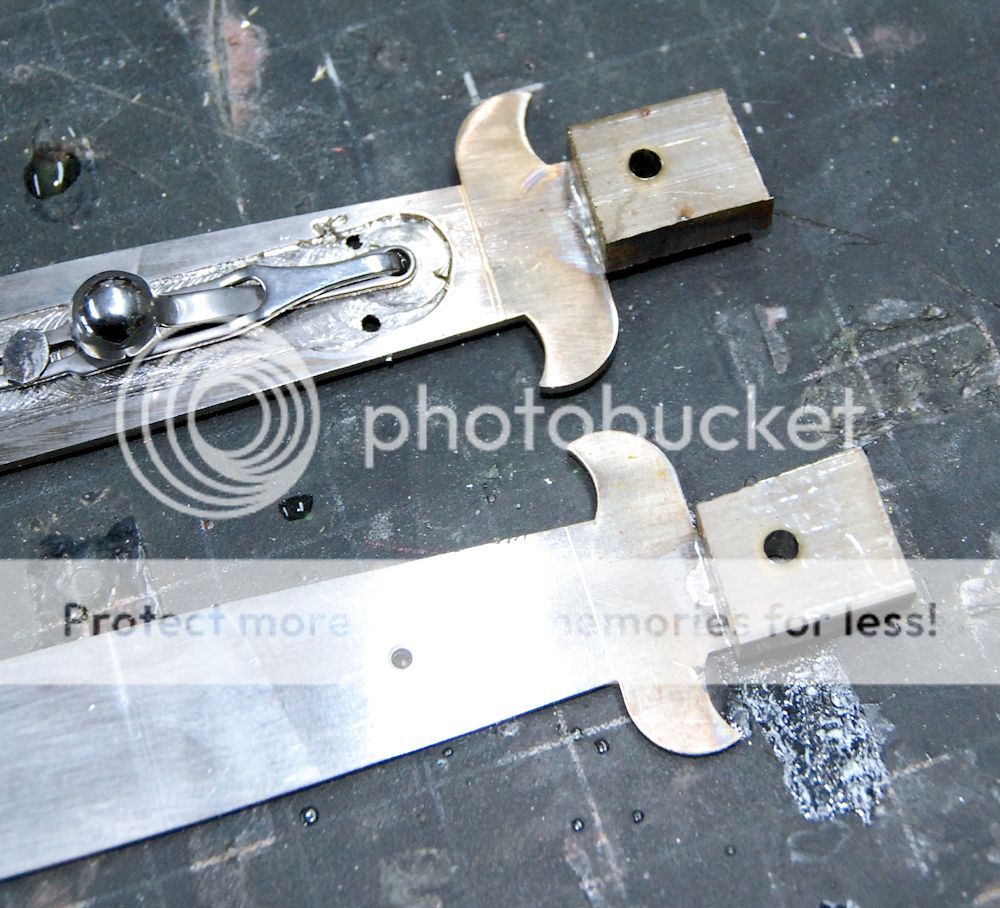
Here George has cut a couple of pieces for the front bolster:

Image

He lays the liner on top, note the guidelines. (Apparently he uses the front one, but not the rear one).

Image

Here's the flip-side showing fronts and rears, just validating that everything will work out.

Image

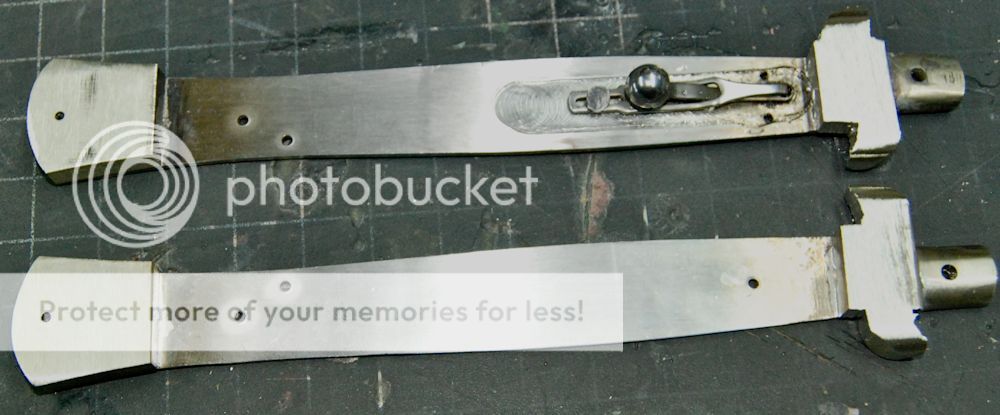
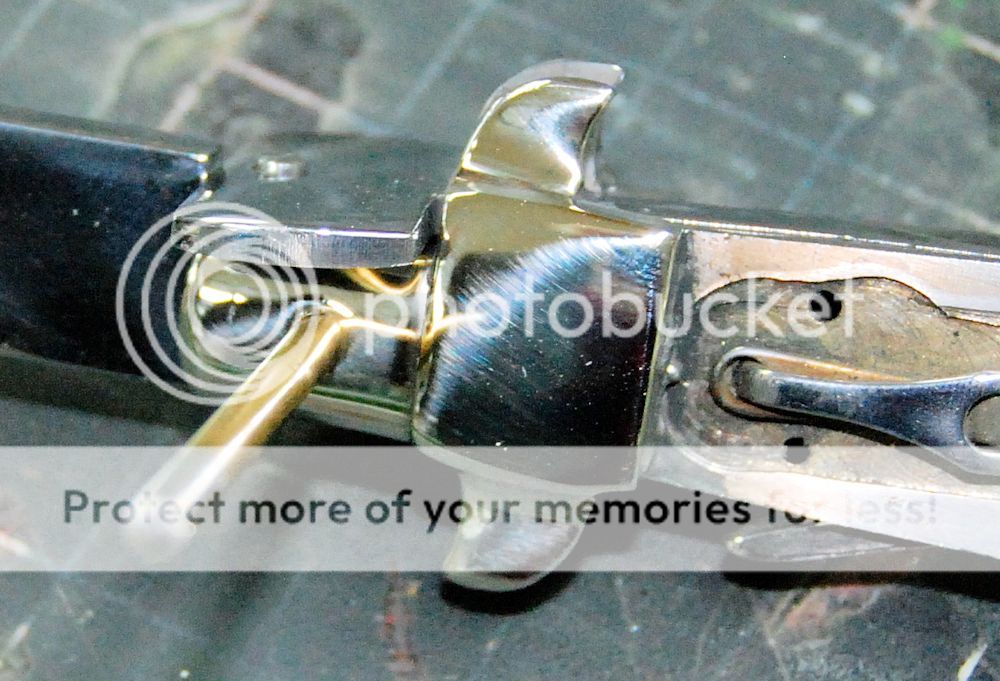
George starts to solder, point side first.

Image

It's not clear whether the last picture just sticks the front piece in place so that he can do the rest, or whether capillary action draws the solder all the way down. In any case, he's caused the chunk of NS to be joined all around and the liquid solder has flown underneath and even bubbled out of the pivot hole.

Image

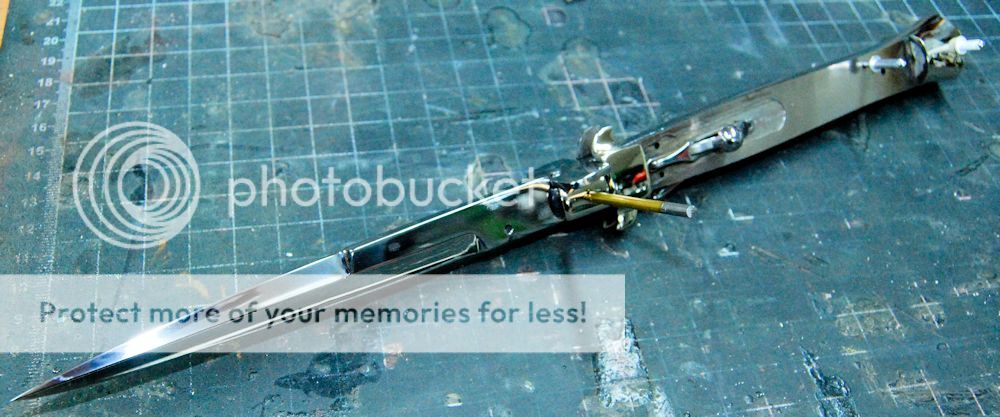
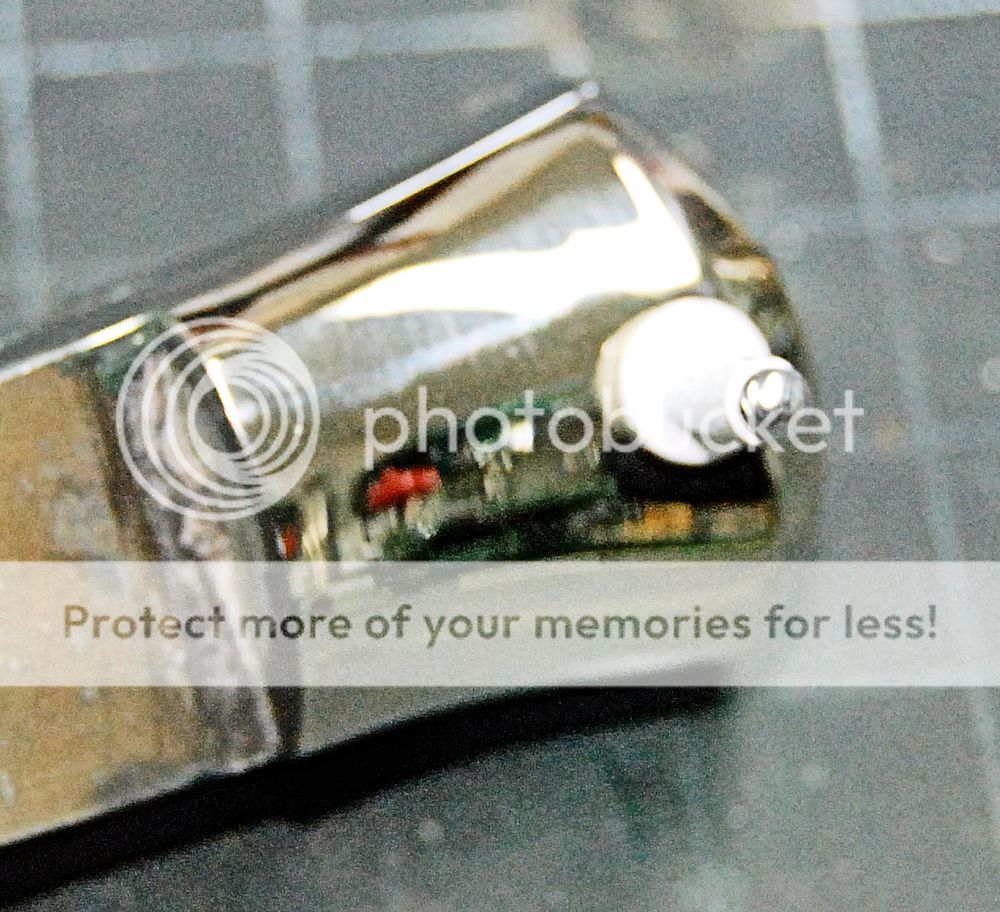
In the next two shots he sets up level and drills out the pivot hole.

Image

Image

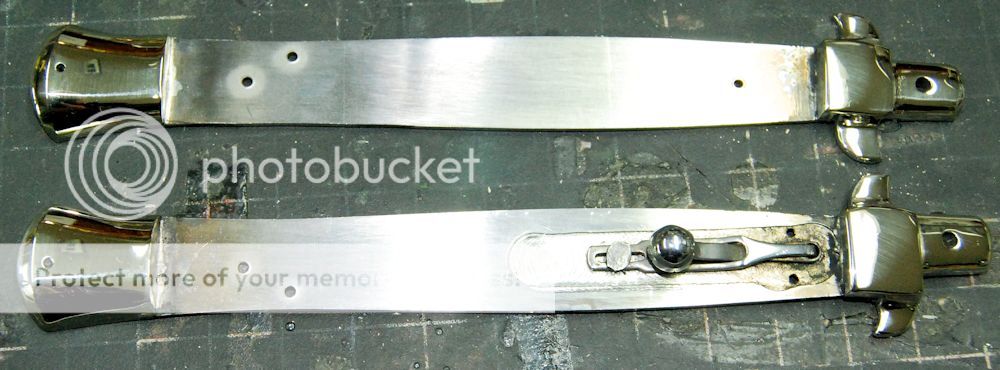
Once this is done, he adds the other piece of the top bolster, only now the solder joins the other NS piece to the liner and bonds it seamless to the previous piece (no picture). From there he works on the pommels (rear bolsters).

"Then I profile them to a rough shape and then very carefully grind them to (final) shape on my 2 X 72 inch grinder working from a 36 grit up to a 400 grit. After that I polish them to a high luster. I started these at 12:00 noon and had them done at 2:30 PM."

I hope this gives you some ideas as to how you can proceed on future projects.

Thanks for listening.
Dave Sause
oldandfat@cox.net
(405) 694-3690

"And you're telling me this because, somehow, I look like I give a shit?"

"Let a smile be your umbrella and you're gonna get your dumb ass wet."
User avatar
The Reverend Sharp
Posts: 55
Joined: Tue Aug 26, 2014 10:45 pm
Location: A World Away

Re: How to build & attach an NS bolster - made simple by GC

Post by The Reverend Sharp »

Very informative.

NS is a very exotic material where I am. By the time its posted I'm looking at $50 per foot of 1 1/4'' Bar.

Luckily old NS Cutlery is reasonably common.

The two peice method makes NS Bolsters a whole lot more viable.

Great Tutorial Dave, thank you.

George approaches things very much like me and his processes are very relatable, 2.5 Hrs!!! Man, he's fast too!!
littlejimishiv
Posts: 10
Joined: Wed May 14, 2014 8:12 pm

Re: How to build & attach an NS bolster - made simple by GC

Post by littlejimishiv »

Hey Man;
Fantastic! Thank you so much for this outstanding informarion & demo! Once again I never thought of aproching bolsters this way! I will show you the results of my attempt when I have enuff time to myself to get something done! It seems these days I find myself working on my knife making at odd wee hours of the night. So I can work uninterupted for a couple hours at a time. Unfortunately some of these late-night indevors have produced a few larger problems then I was trying to solve! Again, thanks for the demo it looks so great!
Your Friend
Jamie/Littlejimishiv
Ct-USA
User avatar
ILikeStilettos
Posts: 1576
Joined: Tue Jan 28, 2014 3:36 pm
Location: Norman, Oklahoma, USA
Contact:

Re: How to build & attach an NS bolster - made simple by GC

Post by ILikeStilettos »

I asked George a couple of follow-up questions and he graciously provided more pictures along with his answers:

"Yes, flux is needed. The liner and pieces are clamped standing vertically in my bench vise and I hold the heat down at the bottom tip where the pivot hole is. That way, the solder flows down towards the source of the heat and coats the spaces between the liner and the NS.

I use Sta-Bright solder and liquid flux that I get from Jantz. I take each piece and grind a small channel on the back side. I start at the pivot hole piece and clamp it as in the photos. I then put a couple of drops of solder on when its clamped in my vise vertically. The flux naturally runs down that channel and coats the backside so the solder will stick. Both the NS and liners have to be very clean. I sand them lightly first.

I hold my MAPP gas at the bottom of the piece and the solder melts at 430° and by capillary movement the solder flows towards the heat and coats the entire back side of the pivot piece." (Dave's Note: MAPP is a trademarked term for methylacetylene-propadiene propane. Per Wiki, what you get today are all substitutes. These versions are stabilized liquefied petroleum gas (LPG) with high levels of propylene. In any case, it's a substitute for acetylene.)

Here's the top part of the front guard in place and drilled for the pivot pin:

Image

George works back and forth between soldering and shaping, and when you think about it, that's perfectly logical. It's so much easier to form the front barrel with nothing else in the way:

Image

"For the top wing-guards I again clamp it in place, but also clamp the bottom pivot piece with a small c-clamp; so that it won't fall back off when heated. I again use a couple of drops of flux in the channel and heat and solder, holding the MAPP gas again at the bottom and the solder at the top of the channel. When it heats up, the solder naturally flows down into the channel, filling and getting into any tiny spaces. When I shape and polish everything they mold together making the guard look like one piece but they're actually two."

In this next photo, the pommel (bottom bolster) pieces have also been attached and George has started shaping the rear 'wing' piece of the front bolster. Note that he is creating traditional wing shapes, but leaving a flat area on the bolster for engraving. As long as there is adequate material in the liner and the NS, you can do almost anything you want now: earless, flatguard, wild custom, anything you can imagine and shape is possible. Also, this is not a two piece front bolster in the traditional sense, where a thin piece of wing material is formed and soldered to an underlying cylinder of material. This is a matter of preference for the builder, however the Engineer in me really appreciates George's straightforward and logical approach. He breaks things into simple and repeatable steps so that the process itself is no longer a challenge. His practice sessions are all about developing muscle memory and devoting less brain power to the "how" and more to the "what". Thus, he becomes extremely skillful and can concentrate on the artistry. Bravo! You are one smart cookie, George!

Image

The rough shaping has been completed. Note the lovely hollows on the pommel. They're harder to see once it's polished.

Image

Here's how they look when they're shined up.

Image

He does a quick fit check. (Actually, he's done several of these along the way, as the lock tab has to clear the front of the wings and seat well against the notch in the top bolster. All of this happens in the rough, so that when he polishes, no further adjustment is necessary.) I've been in George's shop when he gets to this stage and it's really cool to see the knife pared down to it's metal essentials. This knife is already stunning and wicked looking. As much as I like wild scales, this is just about perfect. When the cake is this good, no icing is necessary.

Image

Front bolster detail. This is one of the areas I always notice when looking at a new builder's knife. Too often, in their rush to complete a knife they get it buttoned up without taking pains on the tool marks. By then, it's too late and too hard to get at them. With George's approach and prior to final assembly there is no place on the knife that he can't get to with sanding and polishing wheels, therefore, everything gets polished to perfection. You don't really need to polish the inside of the liners or the bottom of the kick spring, but George does. When you look inside the blade well on one of George's, it's like a mirror in there and everything reflects. This makes it hard to photograph, but it sure is sweet. George builds quality with a capital "Q". (Yeah, I know, I didn't capitalize the word!)

Image

Here's a close-up of the pommel. The high shine gave the autofocus a hard time, but you can see a bit of George's tidy shop in the reflections.

Image

Well, that's it. I hope you've enjoyed the post and picked up some useful tips. Post, PM, email or call any time.
Dave Sause
oldandfat@cox.net
(405) 694-3690

"And you're telling me this because, somehow, I look like I give a shit?"

"Let a smile be your umbrella and you're gonna get your dumb ass wet."
Post Reply