There are two fundamental steps to the process:
1) Figure out how to set the camera to get the best possible results it is capable of.
2) Do the least amount of editing possible.
That sounds rather simplistic, doesn't it? For starters, each step is dependent on what you personally are working with, hardware (camera and accessories) and software (photo editing program, cloud storage, method used with forum).
I have a pretty decent camera, a Canon with a zoom lens (non-interchangeable lens, but otherwise a digital SLR).

It has a pretty large screen to compose and view pictures, but at 67 my eyes are not that good anymore.

I also have one of these IPEVO document cameras, and lots of other knife guys have them, too. In some cases I bought them as gifts. I bought the IPEVO because another guy was getting great pictures with it. The biggest advantage is that it plugs right into the computer so you see the results on a full sized screen before you take the picture. It has decent 1600 x 1200 resolution, so if you don't have to do a bunch of cropping the pictures are pretty good. It's perfect for tang stamps. In my case, my 'studio' is a sun room with lots of glass windows and it seemed like unless I shot at minus -2 on the exposure, all the detail wiped out. Note, this is a document camera, meaning it is very 'contrasty' since it's trying to capture text off a page. While it shoots in color, the color balance is sometimes way off and there is no adjustment. I would save my pictures onto a thumb drive and then take them to my office for editing and publication. Even after I reached the limit of what this little camera could do, I was still unhappy with the results.

The Canon is designed to support the average guy who just wants to take a picture. It has lots and lots of adjustments and is supposed to focus down to 0" but with the default settings, that just wasn't happening. I read and reread the manual. At Don's suggestion I set it for ASA 200 instead of auto, set it to aperture preferred at the smallest possible F8 aperture. This gave me lots of "depth of field" and I knew to then shoot from a tripod. I found out that using the self timer kept me from wiggling the camera and I needed to bracket exposure. It took a bit of experimentation and five or six re-readings before I figured out how to set the exposure to -2/3 and ±1/3 (and to figure out that's where I needed to be). The camera does regular focus, manual focus and macro focus. Macro gets me in close and the camera focuses accurately, it just operates differently than the other two and you have to be on the maximum wide angle (boy, was that hidden down in the manual and you had to infer it - it wasn't stated specifically, and you needed a couple of other non-default settings to make it work.) Then I realized I was shooting on "daylight" instead of "shade". This really helped with color balance. It has three types of metering: average, center weighted, and spot. The first tended to wash out, the last tended to be too harsh depending on if I was concentrating on a light place or a dark place on the knife. I needed center weighted. Some of these settings automatically reset themselves, so I had to keep resetting them during a photo session. I originally went to the IPEVO because I could readily locate that day's pictures on the thumb drive instead of among several hundred on my camera chip and which made the whole process sloooooow. I finally found the smallest chip available and used that for only knife shots, so I had only a few pictures to pull up, and I could erase the chip once they were copied to my hard drive.
All of that was to get to three workable shots. What you see from this point isn't exactly what I see, all the shots have been reduced to a maximum of 1000 pixels wide (what fits the forum). At home I use the full 4000 or so pixels and work on a 22" monitor, but they are close to what I see.
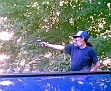
Here's the Canon shot at -1/3. The idea here is that a dark shot can be brightened digitally, all the detail is there. An overexposed shot is washed out and you can't pick out details that aren't there. Maybe it's my camera or studio, but a bit underexposed is needed. Also note, the widest zoom setting gives me a fisheye effect. Mostly it's OK, but you want the front of the lens parallel to the knife else the closer parts enlarge and the ones further away decrease - it makes for some pretty distorted knives if you aren't careful. (I broke my own rule on this picture, with this knife it's not so noticeable.)

This is -2/3 and the one I will end up using.

This is -1-1/3 and it's a bit too dark. Those three are pretty darned close to each other and the color rendition is pretty accurate. Note, for each set of 3 pictures I have to compare very carefully. Some knives like less exposure, some like more. Everything up to this place was to get me to have some good shots to chose from.

My editing software has a 'one step photo fix' and up until the last session or so I was using it on practically every shot. Here's what I got when I took my selected picture and applied it - it's brighter, but the colors are off and harsh. This was a surprise to me. One step is good for a fast fix and if you aren't real fussy, but if you get the exposure and color balance correct - then you won't want or need to use it.

The next step is to crop the picture down to the knife. I think most cameras show you a box around the object in the viewfinder - but it's never 100% correct. Sometimes I have to do a "free rotate" of a degree or two to get the knife aligned horizontally, vertically or diagonally before I crop. I'm using the maximum resolution my camera allows so that I can crop radically. I just try not to as much as possible, because this is zooming in and the picture gets grainy fast.

Without going into a long technical explanation, all digital cameras tend to 'soften' the focus. I was using a fast generic 'add sharpness" but this made for 'pixelated' images. Don pointed me to a thing called sharpen, unsharp mask which allows me to set three parameters and preview results: radius, strength and clipping. Don's guidance was to resize the image first and then view at full screen 100%. In other words, adjust only what was closest to where you planned to stop. Since sharpness routines look at groups of adjacent pixels and a range of color difference in those pixels and then try to rebalance them, I felt it was better to have the maximum number of pixels available to play with. The default setting is 2-100-5 and I found the best results at 20-n-4, where n=100 for 3000 or so pixels wide and it falls to 50 if the picture is only 1000 wide. If you compare the unsharpened and sharpened pictures they're very close, the sharpened just looks like I focus better. This is the light touch I was looking for.
unsharpened
sharpened

At this point I resize to 1000 pixels wide. This reduces the file size and makes for a picture that 'fits' the auction and forum screens, if it's too wide then the picture either scrolls off screen, or gets refitted to the screen and your text shrinks to where you need a microscope to read it. This makes it much faster to upload to Photobucket as well.
Now back on Don's plan, I use a "clone brush" to take out all the little hairs and dust particles and white noise. I often have to set the brush to something that looks about 1/8" in diameter on my screen, so I'm cloning a very small area at a time. Here's the cleaned up image.

Like I said at the beginning, I hope this does you some good. One final comment: you may have noticed that knife guys typically favor a particular background, it's almost like a signature - but there's a good reason to do this. Patterned backgrounds are too distracting and you can't focus on the knife. You want something soft, not shiny, as these add more reflections and if it's a bit out of focus, the background tends to disappear. A very light or a very dark background fools the metering and the amount of compensation has to change. My green felt is neutral and easy on the eyes and it works for me. It's a pet hair and dust magnet though.
Thanks for listening, and good luck.